Hi everyone! It’s been a while since I last posted and I’ve been busy! I thought it was about time that I got back in to blogging and I wanted to share my latest project with you all.
Ever since I moved to Portland, I’ve thought about getting chickens. The urban farming culture here is one of the things I love most about this city, so when Mike and I were looking into buying a home last summer, a backyard with room for a coop was essential. We finally did it last September, and I immediately got started thinking about the type of coop I wanted to build to accommodate some new feathered friends who would supply me with fresh eggs every morning. We were thrilled when we found out that the previous owners were going to leave their play structure in the yard but had a tough time deciding if we would keep it for our kids someday or turn it into a chicken coop. In the end, who doesn’t love a good re-sourcing project?! (sorry future kids)
The chicks arrived right around Valentine’s Day, and I fell in love with them immediately! Here, let me introduce the little ladies…

Sleepy babies on their first night home. Front to back: “Vegemite” the Black Australorp, “Belina” the Buff Orpington, “Stephanie Colbert” the Ameraucana, and “Taunton” the Barred Rock (Taunton was replaced in week 2 by “Strata” due to a few toe eating incidents…a blog post for another day)
I still had a few weeks of school left at this point, so I was happy to have their little “cheeps” helping me get through some late nights, but as soon as I was done, it was go time! I had 3 weekends to get the coop built before they would outgrow their brooder and be ready to go outside.

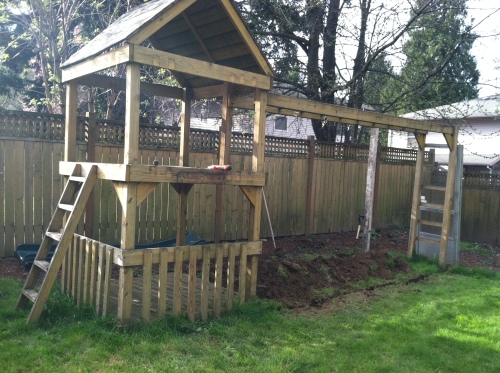
The swing set after removing the slide and swings. Emmett, our cat was acting Coop Inspector throughout the process.
I should mention that I went into this never having built anything before and being entirely intimidated about having to use an electric saw, but the cedar swing set was a perfect solid structure to build off from, and it made me comfortable enough to tackle my first construction project.
After some research, I learned that certain things were going to be key in making my chickens safe and happy. These included a dry place to sleep, preferably off the ground (the second story of the play tower is perfect!); a run that they can access during the day (the swing area); a covered area for their food (first story of the play tower); and security from predators. The predator issue is different for everyone depending on where you live, but in the city they tend to be mainly domestic dogs, opossums, and raccoon. Luckily we have a fully fenced back yard, so that takes care of the dogs, but for extra safety against the others, I decided on 1/2″ wire mesh instead of regular chicken wire, and then buried it in a trench around the run so that nothing could dig its way in.

Bare structure ready for building with trenches dug around the run and an added support beam in the back right corner.
I was determined to use as many re-sourced materials as possible in the build, and our local ReBuilding Center came in really handy. I found some great things, like a full size door for the run, an old solid wood cabinet, and all the lumber I could ever need. One thing I didn’t mention before is that chickens need a safe cozy place to lay their eggs. This is the result of my first attempt at using a reciprocating saw on that cabinet I found…I don’t think the ladies care much that the lines aren’t straight 🙂
One thing that I did buy new was some good 1/2″ plywood for the sides of the hen-house. I wanted it to be ventilated but not too drafty so that the girls don’t get cold in the winter months

The hen-house is enclosed with plywood, leaving room for a door in front and on the right side leading to the run.
After a few weekends of building and help from some amazing friends, we got the coop ready for the chickens to move in just as they turned 8 weeks old. Which is a REALLY good thing! I would recommend them to anyone, and raising them from day-old chicks is an absolute joy, but by week 5, I guarantee you will want them out of your house. There is nothing quite as smelly as chicken poop, and the garage probably would have been a more suitable place had I not totally fallen in love with “Chicken TV”. Cable shmable…these guys are entertaining!!!

Inside the hen-house there are nest boxes for laying and a roosting bar for sleeping. I use pine shavings inside as well.

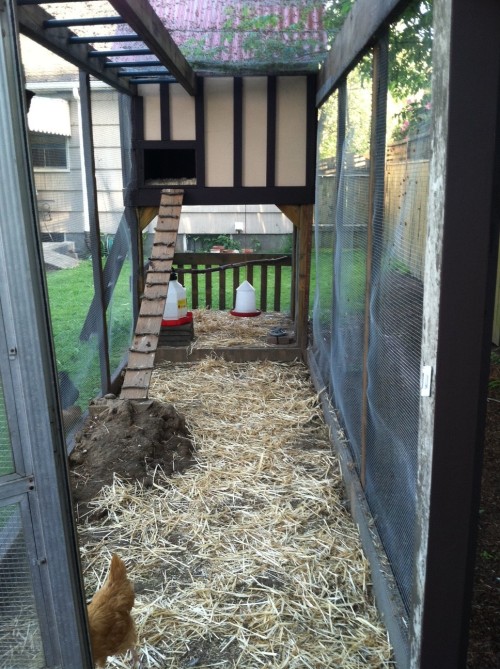
I can open their door from outside the coop just by sliding it. This is important for when I want to keep them warm in the winter. It took them a few days to get comfortable with the ladder, but now they are pros!
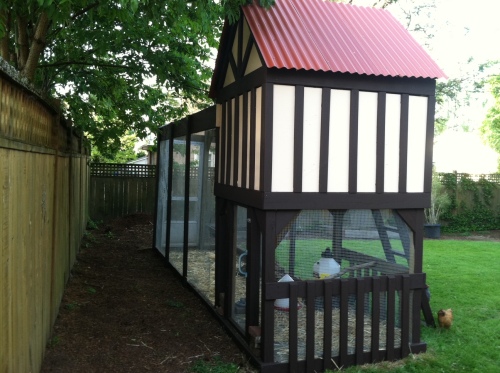
I have always loved the Tudor style houses and wanted one for myself, so I figured since I don’t have one, I would make one for the chickens! They deserve it…they are going to give me a delicious breakfast every morning! I used all low VOC paint, and the guys over at Miller Paint were super helpful! We also got some corrugated roofing to keep the rain out of the coop which was a little leaky from the existing wood roof.

The Chicken Tudor (back) – There is a back door which makes it convenient to change out food and water without having to walk through the run. +Stephanie

The Chicken Tudor (run) +Belina. I use straw in the run to keep it from getting too messy. It keeps things dry and the chickens like to dig around in it.
Now that the coop is done, I’m really enjoying bonding with (bribing) my new buddies.
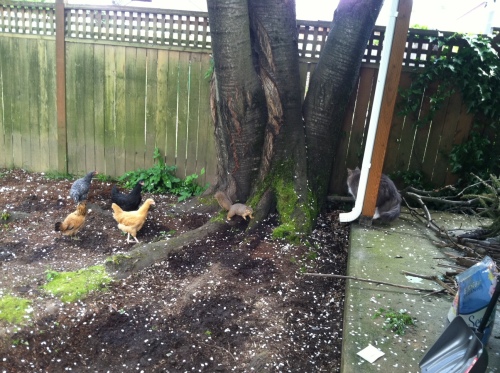
I was originally really worried about how Emmett would react to the chicks, but they get along great! He loves to watch them, but has never been aggressive…he may be a little too relaxed actually.
Now, this was a fantastic project, and I couldn’t be more happy with the outcome, but there were definitely some lessons learned that I feel like I should share:
Firstly, chickens do not require a structure this large. It was great to have the play set to work from, but it also presented a cost issue that I didn’t anticipate at the start. Wire mesh and lumber, yes even when used, is way more expensive than I thought it would be! This is construction 101 for sure. I wanted to work with what I had and also be able to walk into the run, so in the end that is what won, but my chickens will probably finish paying the mortgage on their coop (in eggs) right around the same time I pay off mine. Thank goodness they have entertainment value too 🙂
Secondly, you know that saying “It takes a village”? I love my friends! They were amazingly helpful as construction consultants, chicken consultants, heavy lifters, and wire wranglers. I could not have done it without them.
Lastly, a project like this is absolutely invaluable when it comes to gaining self-confidence for future home improvement projects. I feel so much more capable now and look forward to the next project we take on, whether it is replacing our old windows, moving the gate on our fence, or converting the back of our garage into a workable barn for a pygmy goat 🙂 (I kid I kid…hahaha)


That is a fabulous establishment!
I just wanted to say as a fairly-handy male tasked with building a coop for his mother’s new chickens, I found your chronicle extremely helpful in my planning to turn our own old wooden play-set into their future home- now I just have to make it a reality!
Been looking for a way to convert my old swing set into a coop. My niece told me to look on pinterest, and I’m glad I did. Now I have a good idea from the information you posted. I will keep the pinterest family posted………
What a lovely house! We have a similar play-structure in our garden, and I´d love to turn it into a chicken coop like yours. Thanks for the idea. All the best from Denmark!
LOVE what you did with the swing set! We are about to convert ours, too. Had a question about the wire mesh… What kind did you use and how much did you need to cover the structure? Thanks!
I used 1/4 inch wire mesh. It would depend on the size of your run and the width of mesh you can find. My run is 13 feet long, 5 feet wide and 7 feet tall plus I buried it in the ground about 1 foot. We are now on to our second flock of 6 chicks and they love it!
Just found a free swing set I am going to repurpose for a coop and run. But, I need to know… how many chickens do you think yours houses? I’m looking at the same basic set up.
I only had 6 at our peak and I also eventually built an extended uncovered run for grazing outside of the playset enclosure. That being said, this is really a matter of opinion, but I probably wouldn’t put more than 8-10 in there if you aren’t going to let them out on a daily basis.
i love this! Great Job! Thanks for confirming my swingset coop idea!
Now i hope & pray my husband & son hop on board!!
This is your second flock? I’m curious. Did you eat the first flock? If so, was the meat tough? How did you clean the house area?
We did eat our first flock and it was not a successful harvest. I learned many lessons that day. #1, don’t try to harvest chickens when you have a 6 month old and expect to do any of the work…My husband had to take over that day and it wasn’t how I had planned. #2, don’t rush it. Chickens need to fully drain and rest for at least a day before you attempt to cook the meat. #3, always slow cook or pressure cook old birds. We rushed everything that day and they were so tough it was impossible to choke it down and I felt like a failure after the raising and egg laying days had been so successful. I decided it wasn’t worth doing again and I would give them away next time. I’ll stick to eggs.
✅your awesome! Love this thanks for sharing❣️